 |
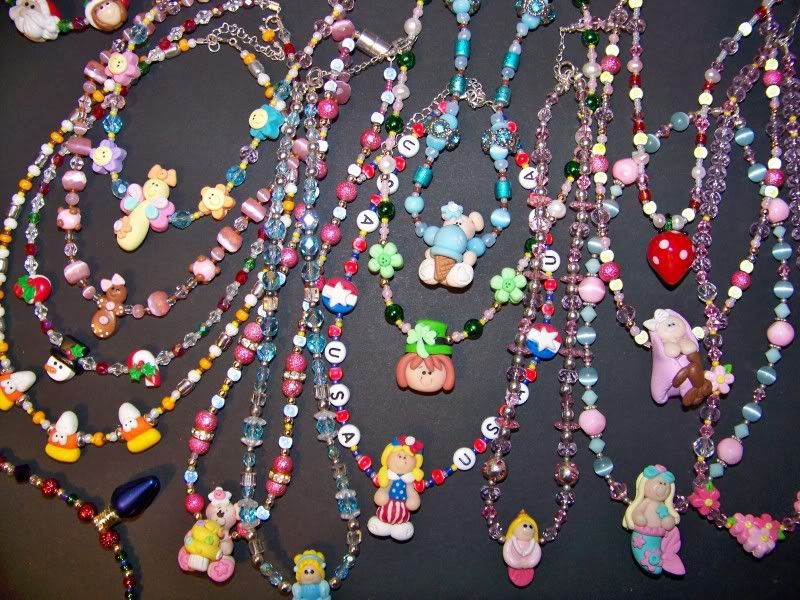
| These are some of the necklaces I have made over the past three years for my daughter. |
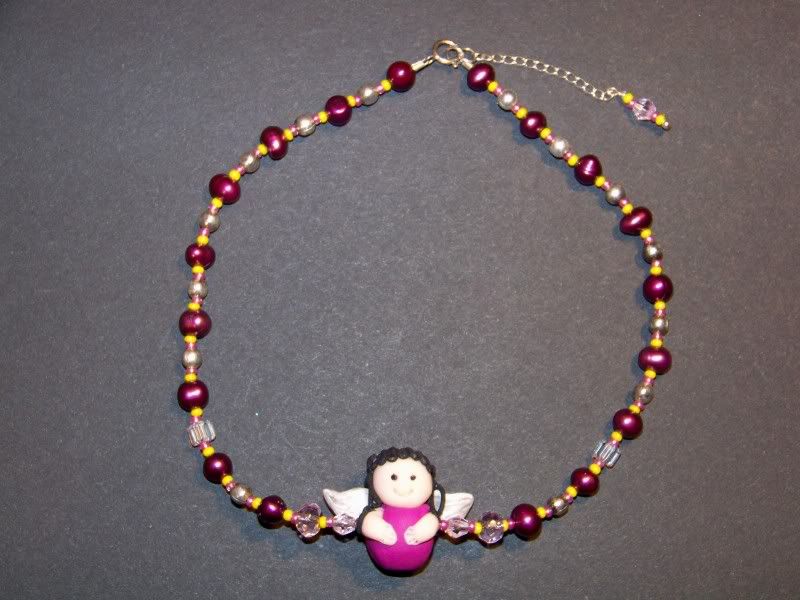 |
| This is one I made a few Christmases ago. I made the angel from Sculpey. The beads include fresh water pearls and sterling silver findings. |
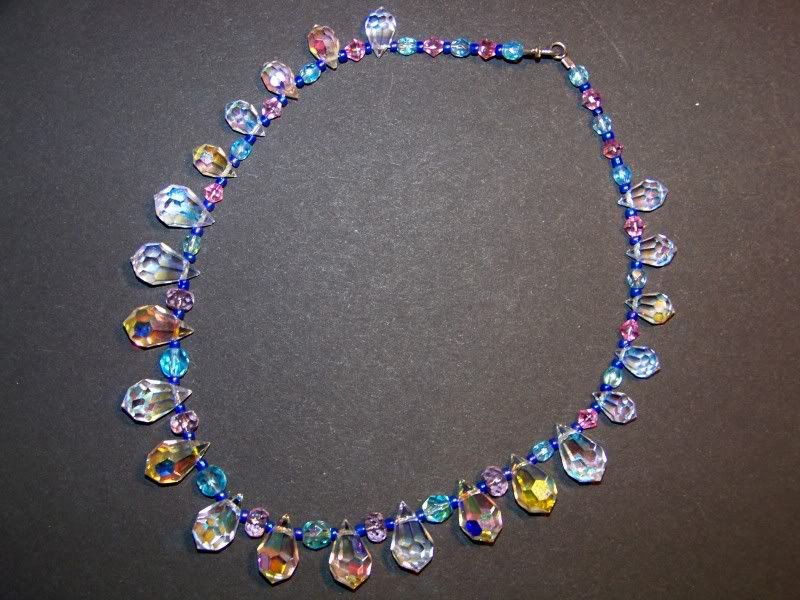 |
| This is made from crystals and is a bit heavy. My daughter refers to it as her 'Princess Necklace.' |
I previously posted a little charm I made with shrink film. You can click here to see that post, including tips on cutting shrink film with the Cricut and coloring it! I popped it on a stretch cord with a few beads and had planned to use it for favors at the Girls' First Grade Play Date that my daughter is hostessing this Friday.
 |
| This was my original bracelet on Magic Jewelry Cord. I had visions of them being used for slingshots and breaking, beads shooting everywhere! |
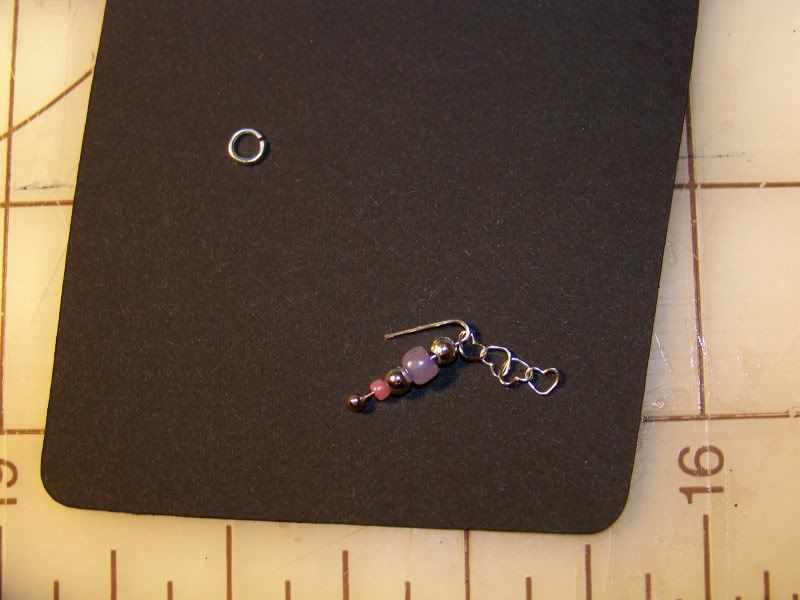
I decided to re-do them, using a coated jewelry wire and spring rings. I added extension chains (I love heart-shaped links for little girls' jewelry!) and beaded head pins.
I love these soooo much more! They match the charm.
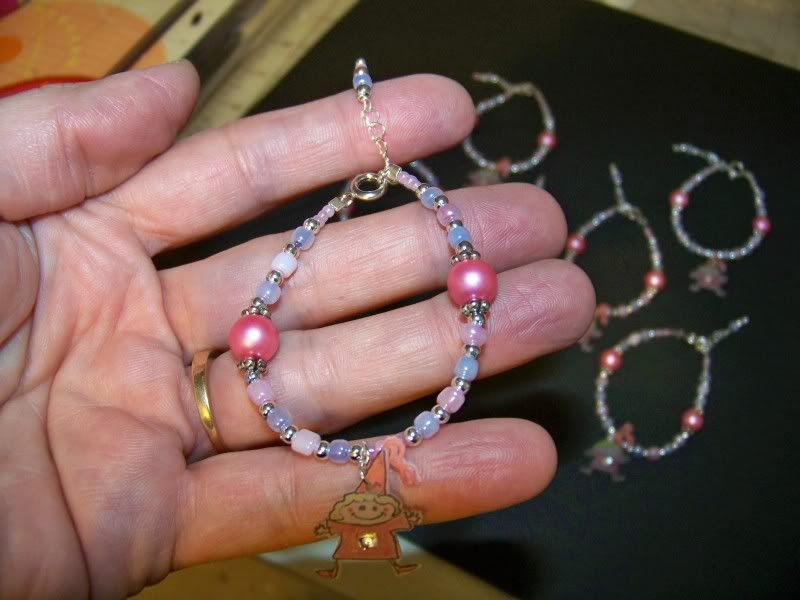 |
| These were re-made on a stable coated jewelry wire and closure. |
I wanted to share how I made these -- it is the same for the necklaces I have made too.

Usually, I am only making one special necklace, so there is a bit of play with bead pattern and color. The bracelets were different. I had to make eight, once I decided on colors.
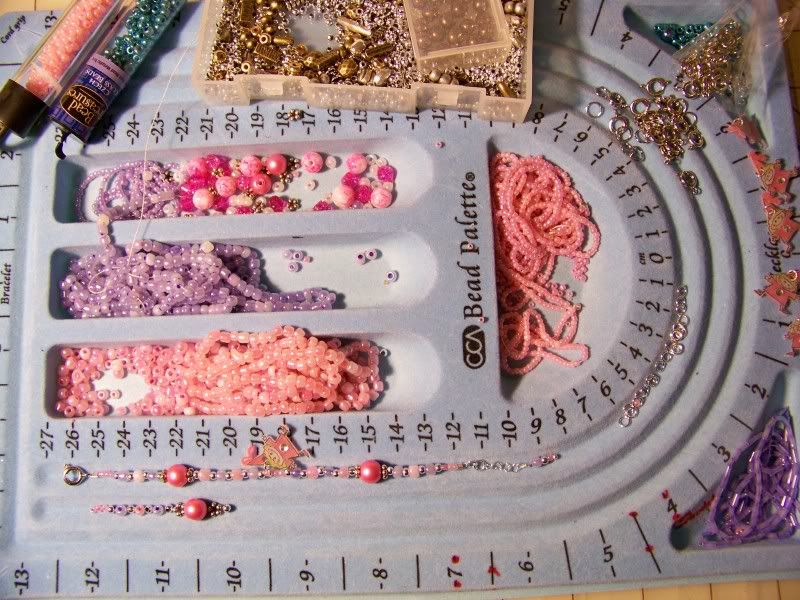
I use sterling open jump rings, chain, and clasps. These beads were all glass and metal. I like using the kinds of materials that I would want to wear for the jewelry that I make for children. I think it is more special than plastic-- and it doesn't have to be diamonds to be worthy to wear! Most craft departments have shell, fresh water pearl, crystal, and glass beads and carry nicer metals. For gifts, I usually include a note letting a parent or grandparent that these materials were used!
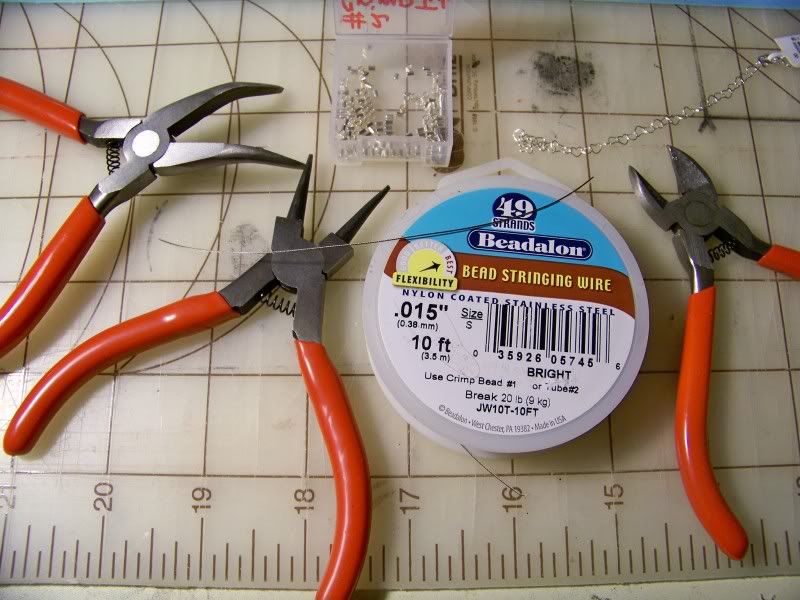 | ||||
| A few inexpensive tools, coated wire, crimp beads, head pins, and chain are all that are needed with your beads. |
 |
| Thread the wire first through a crimp tube, then through the eye of the clasp, then back through the crimp tube. Push the crimp tube up close to the eye of the clasp. Use your needle nose pliers to press down to crimp the tube firmly together. |
 | ||
| When you lay out your beads, remember that when strung, they will take up much less space so remember to make the line of beads longer on your design board than you want the finished project to be! |
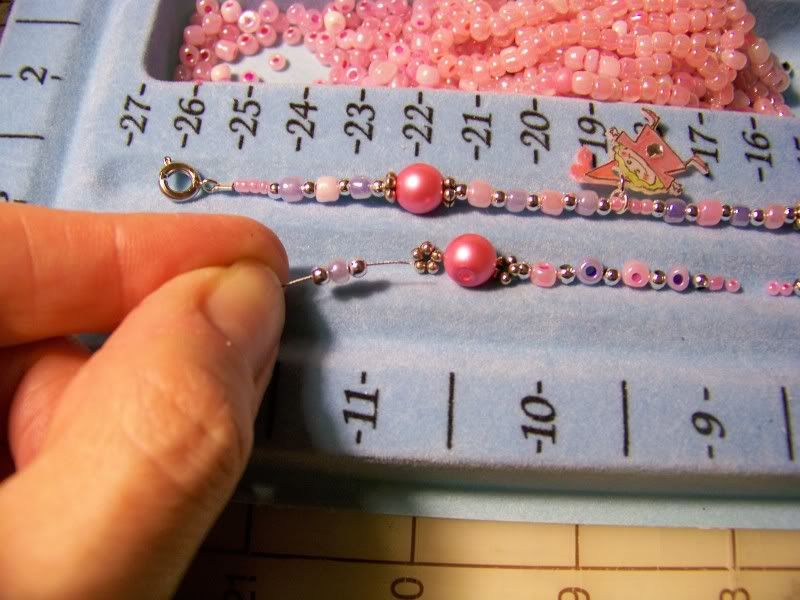
Once all the beads are threaded, I add a second crimp tube, then thread through a closed jump ring, and back through the crimp tube. I run the wire under a few beads and adjust it to bring all the beads up to the ring.
Next, I place a few beads on a head pin. (A head pin is just a bit of wire with a little rounded bead right on the end built in -- think of the pins that they put on packaged men's shirts but without the sharp tip and made of a more pliable metal.) I bend the wire over round nose pliers, slip on a few links of chain and twist it onto itself and around to close it off.
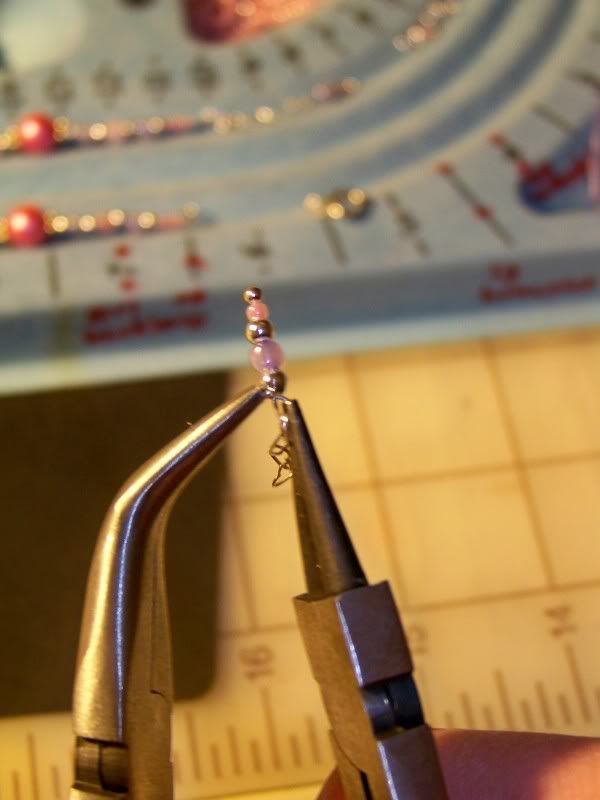
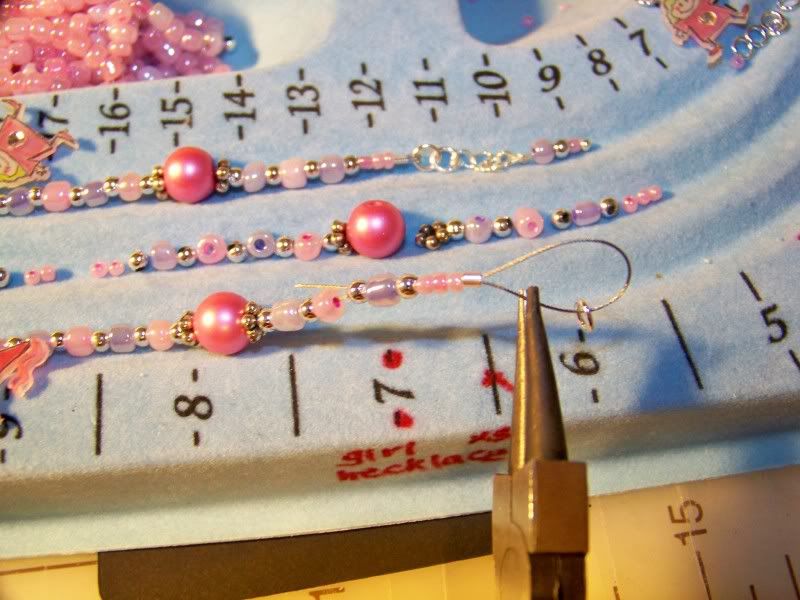
I open the jump ring and attach it to the closed jump ring on the end of the bracelet as well as through the last link on the chain to attach the beaded head pin to the bracelet, and then close it back. When opening a jump ring, remember never to pull open, but rather to twist one side forward and twist the other back. (Close it back the same way!)
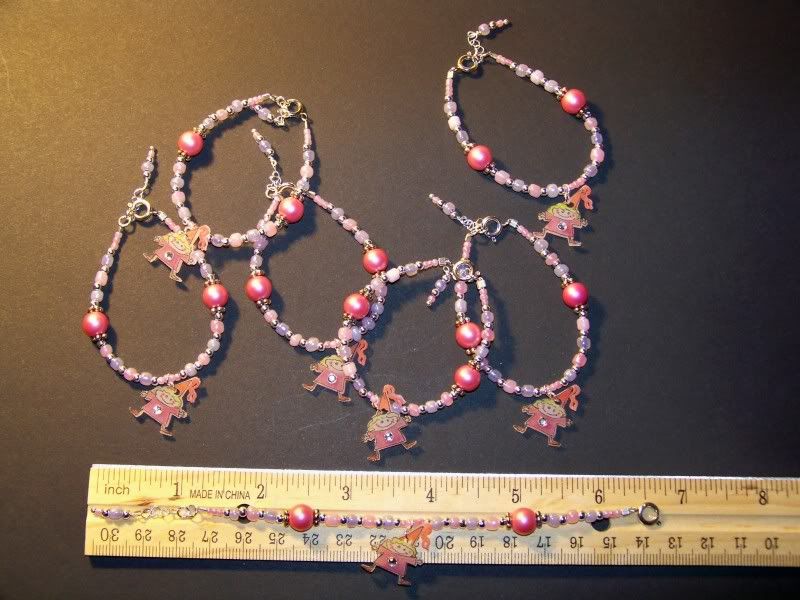
This is the size I made bracelets for my favorite first graders! You can see the extension chain allows about 1/2" of extra length for girls with thicker wrists.
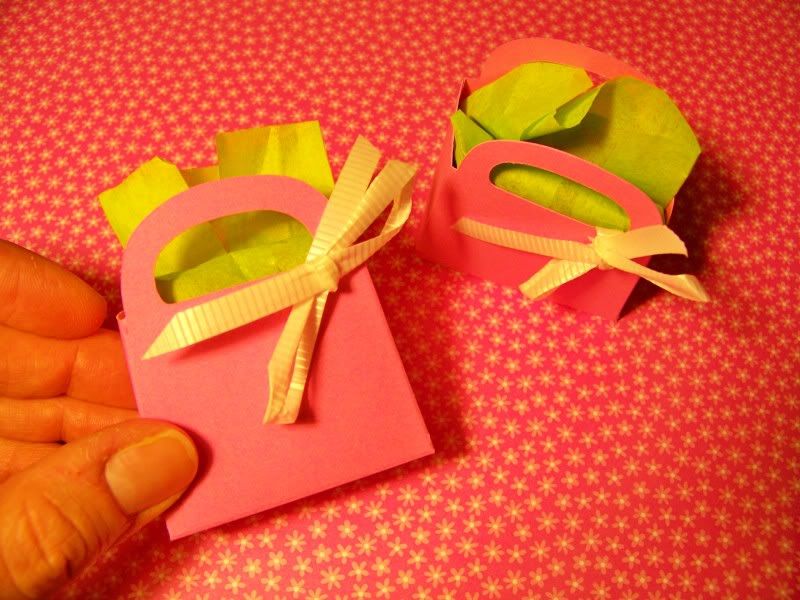
To get them ready to give away, I wrapped each one in tissue paper and made little gift bags. I used the Tags, Bags, Boxes, & More cart, page 115, cut at 3-1/2". I used the same pink cardstock and ribbon that I used on my invitations to keep the color theme.
Thanks for looking at my project. I love making jewelry for kiddos, and I love presenting it even more!
2 comments:
darling....i have been buying jewelry supplies for a while now for when I get a chance. I have a weakness for bracelets LOL but I need to learn how to first. :)TFS!
Very cute, Nadia! I would love to learn more about making my own beads out of polymer clay. They look adorable! What can't you do? LOL!
Post a Comment